WordPress is the “de facto” standard when talking about blogs. Furthermore, WP is not restricted to the blog universe – WP is largely used as a CMS to make non-blog websites. 23% of the whole internet are build with WordPress. Sites like Time, TechCrunch, The New Yorker, Fortune, Variety, Sony, Reuters, GM, Best Buy, and so on. And more important: WP was the platform that I choose to publish this blog 🙂
So if you want to publish a blog, the fastest way is to access the wordpress.com site and create a free account. But beware: wordpress.com is **not** “the” WordPress.
wordpress.com is just a hosting enterprise that uses wordpress. “The” WP is actually a open-source PHP software that you download and install at you own server and can be accessed at wordpress.org. Hosting at wordpress.com is cool, but your domain will be something like “my-blog.wordpress.com” and not just “my-blog.com” – not much professional. If you want a personalized domain name, you just pay for them and they will do all the process to you. It is easy, but I like to control my things at maximum, like a Stalin of software. I like to be free to change the code, install plugins, and so on. So, I decide to migrate from wordpress.com to my own server.
The recipe:
1. Buy a domain:
There are many domain name registrar providers. I choose Go Daddy to buy the learnwithdaniel.com, and payed just US$ 0.99, but was a promotional discount – by now the prices are about US$ 13/year.
2. Buy a cloud server:
As the domain name register providers, there are many options to buy cloud servers. I’m using a local provider (of my city), but there are many options like AWS (the first machine is free, but you need one credit card to create an account), or Digital Ocean (US$ 5/month). Or you can host at your home or at your company – if you have a fixed IP and a specific computer for that.
2. Download WordPress:
Go to wordpress.org and download it. I’m using the 4.1 version. It’s a small file (5.9 MB).
At your server (please don’t do like me – I had downloaded in my PC):
# mkdir -p ~/install
# cd ~/install
# wget https://wordpress.org/latest.tar.gz
# tar -xf latest.tar.gz
# cd wordpress
3. You need to have Apache + PHP 5 + MySQL installed:
I’m using Apache 2.4 and PHP 5.6. Check my tutorial of how to install Apache + PHP if you need. You need to check if your Apache + PHP are working before proceed. Check the versions with: “apache2 -v” and “php5 -v”
To the database, I’m using the MySQL 5.5, installed via apt-get (check with “mysql –version”).
# sudo apt-get install mysql-server-5.5 mysql-client-5.5

# mysql -u root -p
Inform the password that you define while installing the server. Once inside the mysql prompt, create the user and database for our blog (for example, user will be “lwdblog”, password “123456”, database “lwdblog”).
mysql> CREATE DATABASE lwdblog;
mysql> GRANT USAGE on *.* to lwdblog@localhost identified by ‘123456’;
mysql> GRANT ALL PRIVILEGES ON lwdblog.* to lwdblog@localhost;
Exit (type “quit” and press enter) and test the new user / database:
# mysql -u lwdblog -p
mysql> use lwdblog
PS: To change the password (to ‘102030’, for example), type “SET PASSWORD = PASSWORD(‘102030’);” at mysql prompt.
PS II: The best way to manage a MySQL server is with the Oracle’s MySQL Workbench, that you will install on your PC (not on the server). But in order to be possible to access remotely, you need to change your /etc/mysql/my.cnf:
#bind-address = 127.0.0.1 <—- comment this line and add the below
bind-address = 0.0.0.0
4. Create a PHP folder with the WP and create the Apache configuration:
# cd
# sudo mkdir -p /var/www/learnwithdaniel.com
# sudo mv ~/install/wordpress /var/www/learnwithdaniel.com/public
# sudo mkdir -p /var/www/learnwithdaniel.com/log
# sudo chown -R www-data.www-data /var/www/learnwithdaniel.com
# sudo nano /etc/apache2/sites-available/learnwithdaniel.com.conf
Note that you can name this conf file as you want but never forget the “.conf” extension!
<VirtualHost *:80>
ServerAdmin info@learnwithdaniel.com
ServerName learnwithdaniel.com
ServerAlias http://www.learnwithdaniel.com
DocumentRoot /var/www/learnwithdaniel.com/public
ErrorLog /var/www/learnwithdaniel.com/log/apache-error.log
CustomLog /var/www/learnwithdaniel.com/log/apache-access.log combined
DirectoryIndex index.php
AddHandler php-script .php
</VirtualHost>
Note that *:80. Never use something like “<VirtualHost learnwithdaniel.com:80>”. Always use “*:80” even if you have many virtualhost. Is the ServerName and the ServerAlias directives that will tell to Apache what the correct VirtualHost. If you have multiple domain names pointing to this site, you can add multiple ServerAlias. Also note that I use a “log” folder to the logs and a “public” folder for the site itself.
5. Enable the site, test (“Syntax OK”), restart Apache:
# sudo a2ensite learnwithdaniel.com
# apachectl -t
# sudo /etc/init.d/apache2 restart
6. Point your DNS to your Cloud Server
normally your domain name register provider (GoDaddy, NameCheap, …) have an interface to add DNS records. Add an “A” record with the IP of your Cloud Server, and an “A” “www” record also pointing to that IP.
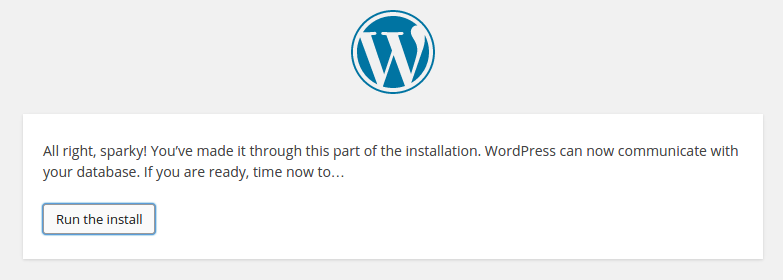
7. Access your site on a browser and configure WP:


The process is very easy and fast. Now, if you access your domain, you will see the blog. To access your Admin Settings, go to “/wp-admin/” (ex.: http://learnwithdaniel.com/wp-admin/).
Now, you can search for a template on the internet or make your own.
